
MyURemote is an extremely powerful and configurable smart remote app with a personalized and easy to use interface. It supports a wide variety of remote control systems, from your phone’s built-in IR blasters as well as RS232, IR Global Cache, and direct IP control of your devices. The app features a configurable interface with options such as customizable macros. More than just a remote for your home entertainment system, MyURemote can even be configured for a variety of home automation tasks as well.

How well does MyURemote fair? Well, let’s take a look below:
- Simplify the use of your Home Theatre system: Create your own personalized, easy to use interface.
- Add recognizable labels to your Rooms, Inputs and Macros, so that buttons become familiar and easy to use.
- Integrate ALL your remote controls into ONE uniform lay-out.
- Lay-out for tablet and for smartphone.
- Configuration compatible with IOS, Android and Windows App.
- Instantly activate the “device in use” remote.
- Display with live feedback.
- Direct network control (smart devices).
- Easy and quick setup with an online configuration panel.
- IR controllers support virtually any device.
- Automatic discovery with unmatched IP control.
- Create your own macros and scenarios.
- Add your favorite channel buttons and icons.
- Highly customisable, and flexible.
- Both home-automation and audio/video control in one app.
- No line of sight requirements.
- Integrate network camera’s within the same interface.
- Integrate complete 3rd party web-based applications.
- Free technical superb (cloud based) support.
- Full integrated Media Centers like KODI, WMC,…
- Full functionalities in one price (comes with a free PC version)!
- Advanced users can build their own web based interface without any restrictions.
Purchasing and Configuration Options
MyURemote is available for any Android, IOS Apple and Windows based devices. That means you can run it on any Android tablet or smartphone. But also iPhone, iPad, or iPod Touch users have luck. Even run MyURemote on your windows PC (freeware). The MyURemote software can be downloaded directly from the Apple App Store or from the Google Play Store.
![]()
![]()
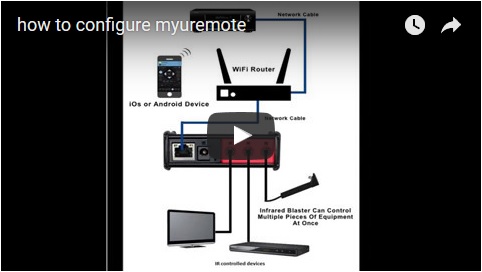
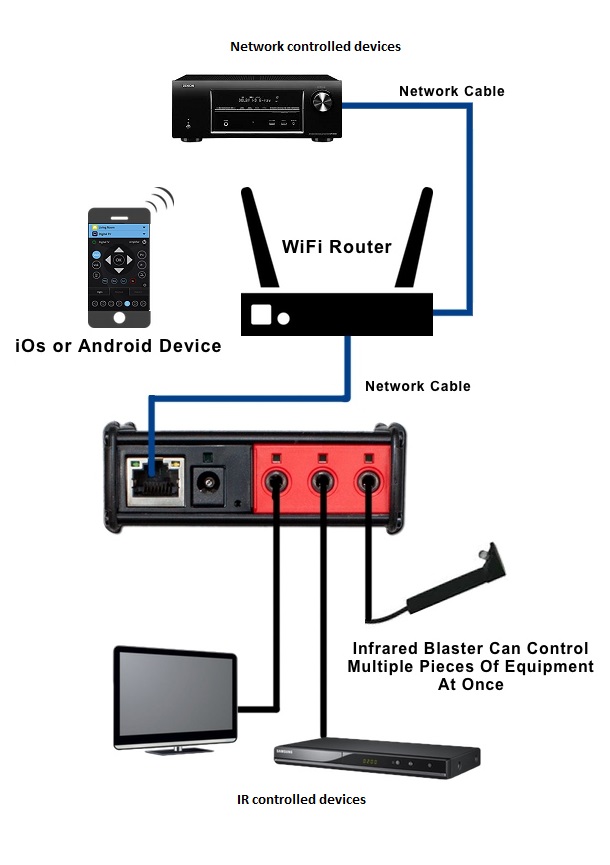
MyURemote controls TCP/IP devices directly over network. In the majority of cases, the MyURemote app won’t meet your needs and you’ll need to upgrade to a configuration with an external gateway to control your older IR devices (not needed if you download and install MyURemote on your android Phone or Tablet with a built-in IR blaster). Here is how MyURemote can communicate with your devices:
- Use your android, IOS or windows device to send commands over a WiFi network to your smart Receiver with Live Feedback and/or
- Use your android as a traditional infrared (IR) remote by pointing with the internal IR Blaster and/or
- Use your android, IOS or windows over a WiFi network and have another device convert the signal to infrared (IR) or Serial (RS232).
Determining Device Compatibility
If you have any doubts or questions whether or not your device(s) are supported, MyURemote maintains a fairly expansive list of supported devices here: https://www.myuremote.com/website/compatible-devices/ From this list, you can check and see if your device can be directly controlled over IP, over IR, or via serial. You can also see if the live feedback options is available to you for IP or serial connections.
|
|
|
You learn an IR command via the Global Caché external adapter’s IR learning receiver port. |

If you don’t see a device listed, you can always train MyURemote to learn all the IR commands of the device by following the very simple steps MyURemote has here: https://www.myuremote.com/website/how-to-add-ir-commands-to-the-myuremote-device-database/
Users who don’t have a IR learn device can use the Global Caché database with thousands of IR commands: http://irdb.globalcache.com/Home/Database
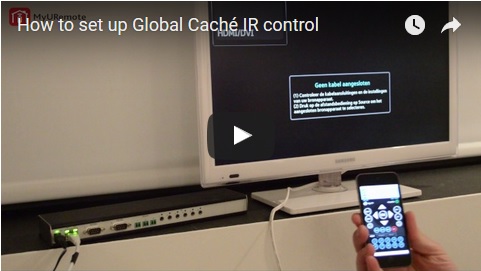
Demonstration
Installation
For testing purposes, I purchased MyURemote on Google Play and purchased one of the iTach ethernet to IR adapters, which transmits MyURemote’s commands on my home network to three external infrared adapters and blasters.
I connected my Pioneer receiver and RaspBMC media server to my network and determined its IP addresses. (Will be configured as IP controlled devices with live feedback.)
Since my other devices can only be controlled via IR, I used the iTach adapter to its full extent.
|
|
|
The iTach ethernet to IR adapter is a small device that converts the MyURemote’s WiFi to IR. I chose the ethernet version, however there is also a WiFi version that will simply connect to your WiFi network making placement easy and flexible. |

|
|
|
The iTach comes with all the IR adapters you will need, including a blaster, which will send a ‘blast’ of IR signals. You can only use the IR blaster on the third port of the iTach, and you must explicitly tell the iTach via its web interface that you are using a blaster on the third port. |

I configured the first IR port to control my Samsung TV, the second IR port to control my Panasonic Bluray player, and used the third port with the “IR Blaster” adapter to control my remaining devices in my cabinet, which included my AppleTV and Cable box.
 |
|
You configure the iTach adapter via your web browser. It’s very easy. If you are connecting the IR Blaster, you must explicitly set the blaster in Connector 3 (port 3) or it will not work. |
One important note is that the IR Blaster is only supported on the third port of the iTach. Because the blaster requires a bit more power and can toast one of the regular IR adapters, you need to explicitly configure the third port to support the blaster.
Tech Note: If you’ve never used an IR extender or blaster before, it’s initially intimidating but very easy. The IR extender is a cable that plugs into the back of the iTach and then at the other end has a small “eye” with double-stick tape. You simply affix the eye portion onto the IR receiver of your device. This then sends the IR signal directly to that device. Most devices will indicate where the IR receiver is with a small “IR” label. If you don’t see such a label, you can easily find the IR port by shining a flashlight onto the face of the component you want to control. If you ever get stuck, MyURemote support is there to walk you through the process.
So, with my components all connected with the iTach, I was all set to give MyURemote a full run for its money.
Setup
MyURemote is very, very powerful yet you are immediately presented with a simple and easy-to-understand interface. MyURemote works along the following four concepts or levels. MyURemote’s interface is designed across these levels. Once you understand these, the rest is easy.
In this tutorial we show the basics how to configure:
In this tutorial we give detailed instructions how to configure MyURemote to control IR devices:
-
Step 1 – Preparations.
Which devices do you want to control with MyURemote? Thousands Devices are Supported: our compatibility lists are constantly being updated with new devices. Check the tables to see if your device is listed. If your device is not in our database yet you can add it yourself.
- If all your devices support IP control.: You don’t need a controller! Goto Step 3.
- If your smart device has an internal IR blaster (IRDA), the ‘IR blaster controller’ is automatically added to your configuration and ready to use.
- If one device does not support IP control or you need a IR / serial controller: (The controller handles the communication between your LAN and your devices/domotics.)
- If one device only supports Infra-Red or Serial(RS232) you need a iTach controller.
- If you need unlimited (IR and Serial and Contact-closure) control you best buy one GC100 controller.
-
Step 2 – Define your controllers (only if you need IR or Serial control).
- Open the configuration panel, click on “Settings”. MyURemote discovers your network looking for your devices and controllers.

-
Step 3 – Define your devices.
- Click on “Devices”, “Add Device”-icon.
- If your device is not in our database: don’t worry, you can add it yourself.
- Enter the IP address or assign your device to a port on one of your extenders.

-
Step 4 – Define your ZONEs (= rooms , or subdevision for special functionalities, or a remote for domotics,…).
- Create a ZONE:
- Assign a number
- Enter a label.
- Choose layout
- For layout “Audio/Video”, first assign your amplifier!!!
- Create a ZONE:

- Assign your devices to input buttons on your remote control.
- Choose your television
- Assign your amplifier input devices

Conclusion and Bottom Line
For years, I’ve been looking for an Android-based remote that could take the place of my multiple Logitech Harmony remotes. Until MyURemote, all the contenders I’ve previously tried or considered have fallen short. In fact, all other solutions in comparison look like pretenders, not contenders.
MyURemote is the first Android remote control that will not only fully replace your previous universal remote solution but make it so easy that you’ll never look back. MyURemote is reasonably priced, powerful, has support for a wide variety of devices and even supports home automation systems. Best of all, the ability to update settings across multiple iPhones and iPads, android and windows instantly seals the deal. If you don’t want to spend thousands of dollars with proprietary solutions that require custom installation, then MyURemote is the best game in town.
![]()
![]()
21 Responses to “Universal Remote Control App for Android:”