introduction:
Devices are added to the MyURemote database almost daily, so this list is not always up to date. If after reviewing the list of devices you can’t find what you’re looking for, or you’re still uncertain whether a device is controllable, please contact MyURemote’s support team for further assistance.
A command is related to an amplifier-input when the input-name is preceded by “INPUT”. (e.g.: “INPUT DVD”, “INPUT FM”, “INPUT HDMI1″…)
A device can only ‘be’ an amplifier when there is minimum one Input command and a Vol+ and Vol- command!
create your new device
- Open myuremote.com and click ‘configuration’.
- Log in to your account
- browse to http://www.myuremote.com/userconfig/pages/settings
- click “Advanced” / “Device database” / “Add New”
Adding IR commands using a Global Caché IR product and iLearn.
iLearn is the companion application for the IR products of Global Caché. This utility allows you to read the IR codes of your remote which you want to add to your personal MyURemote database. For this you can use all iTach models (built in), the GC-IRL, and the GC-IRE (with attached GC-RG1).
Here you find step by step how to add IR commands to your devices database.
Launch iLearn
Download and launch the iLearn utlity for Windows and Mac Version
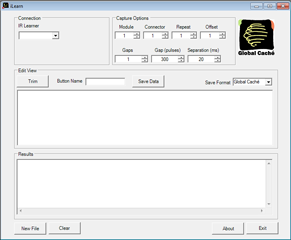
iLearn
The iLearn utility is used to learn IR codes from an iTach, Global Cache Serial IR learner connected to the computer or connected to a GC-100 Gateway.
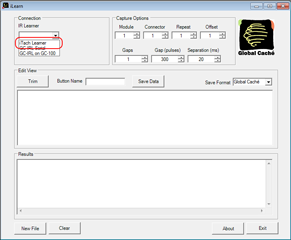
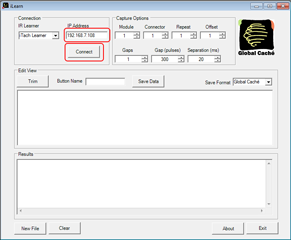
Select Learner
Select the type of learner from the IR Learner drop down list. In this tutorial we will use the iTach Learner included with every iTach IR Gateway.
IP Address
Type the IP address of the iTach Gateway and click on the Connect button.
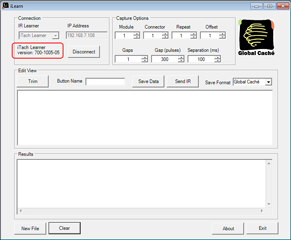
Confirm
Confirm that the iLearn utility connected to the iTach.
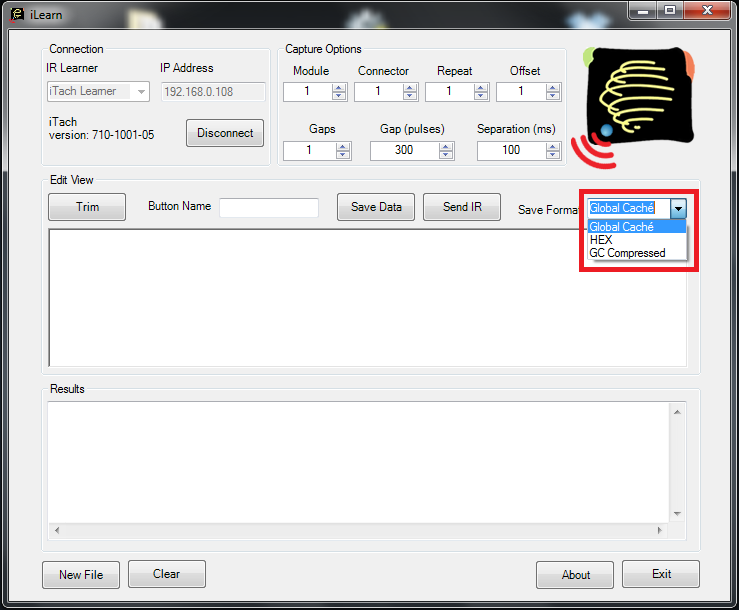
Select Format
Select the Format type from the Save Format drop down list. In this tutorial, we will use the Globan Caché codes.
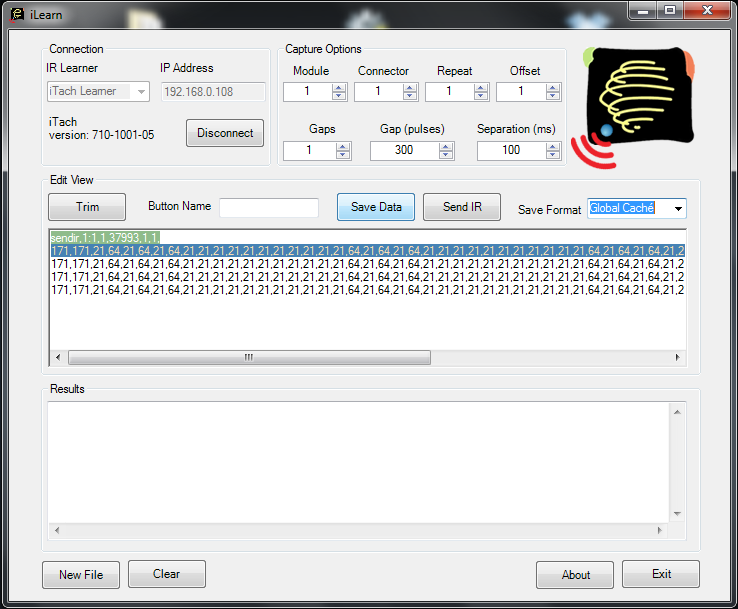
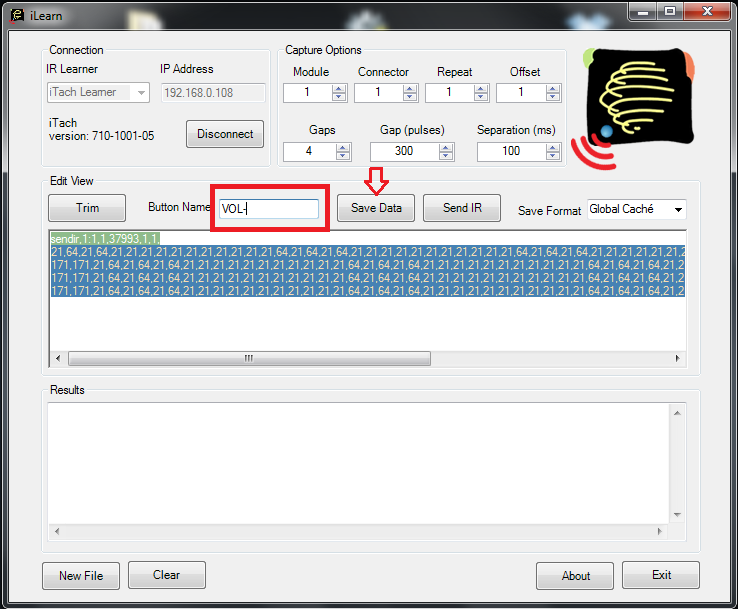
Save Data
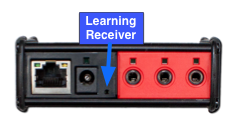
Aim the remote at the IR Learning port and press the button on the remote you wish to learn. Type the name of the corresponding code you are learning and click on the Save Data button. In this example we are learning the volume up button. You can repeat this step to learn additional IR codes.
To add a new device to the database click here. Then define Type, Brand and Product. Do not forget to SAVE. After you created the device you can add the commands.
Start here to import the new IR commands to the MyURemote database: Select Device Database.
Click commands on the device for which you want to add IR commands
Add Device Code
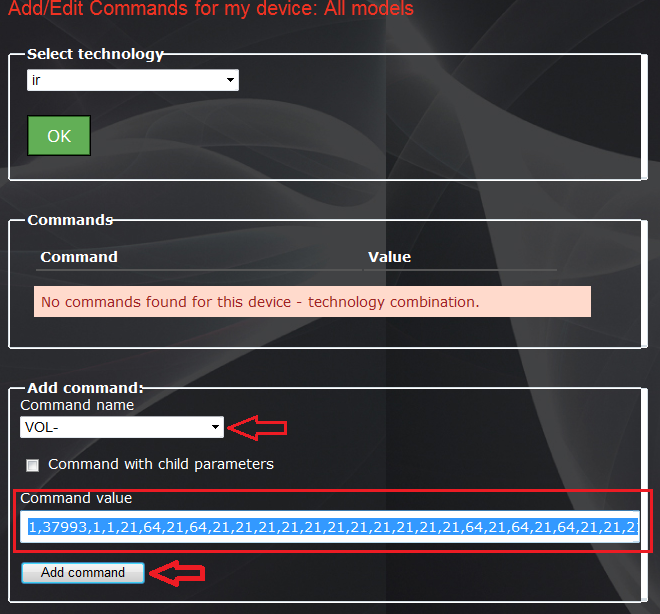
Click on the tchnologie dropdown and select IR from the drop down list. Click OK. Click on command name and select the command name you want to add.
Paste IR Code
Click in the command value field and press Control-V on the keyboard to paste the Code into the command value of the IR code. Please note that when pasting the command it should not have anything other than the code. Make sure there are no carriage returns or spaces after the actual command.
Once the command is added to the commands-list you can edit the name.
Here’s a list of all the public devices (note: for IR or RS232 devices you need a controller):





Hi MyURemote Support,
something is very weird about that app. I have added some commands from the ILearn app and added them by my own to the database. But just some of them are recognized. At the moment I am using a Sony Tv as amplifier. Some buttons are working: CH+ and CH- are switching the channels and ON/OFF are possible, but VOL+, VOL- for example does not work at all. I have added the VOL commands as different types: as VOL max or channel 1 but nothing is recognized by the app (the commands, that work properly, can be seen at the left hand side of the app(all commands), but all other commands are not detected.
BR Andreas
Hi Andreas,
Sony TVs always require a raised Retransmit Count. But usually 2-4 does the trick. Open iLearn and just set the Gaps to 3 or 4.
Best regards,
Verdegem Danny
I have problems to connect with an iTach wf2ir. this is wat I’ve tried:
– connected in the available wireless networks with the GlobalCaché
– open browser http://169.254.1.70
– Disabled DHCP
– entered a free IP Address and entered the Gateway
– changed Network Type into Infrastructure
– entered SSID, Security Type and key
– SAVED the setting
to check the connection from MyURemote I do following:
in MyURemote on the Settings TAB I click “Help” and change 192.168.xx.xx into my IP address.
Than I click the Button below “click: if a red…” but I get an message that there’s no communicatioN
any suggestions?
It is recommended that if you have connection issues, configure the unit with a static IP, and change the router over to 802.11b only mode.
Also activate “sending SSID” in the WiFi access point.
thanks for the reply but still no success!?
The global cache iTach wf2ir or wf2sl can not connect to a wireless network when WPA encryption is AES.
Change WPA encryption into TKIP encryption in your access point or router.
how: connect your router-access point directly (RJ45 cable) to your PC and log in the settings page of your router. (note that the IP address of the PC must be in the same IP-range(this can be the situation with an access point): properties of LAN adaptor – TCP/IPv4 properties – set temperarely (if needed) manually an IP in the same range) In the settings menu choose wireless and wireless Security: set encryption to WPA – TKIP! (not WPA2 and not WPA – AES!).
.
Works! great! thank you very much!